As an Amazon Associate, we earn from qualifying purchases. Some links on this site are affiliate links at no extra cost to you. Our recommendations are based on thorough research and editorial judgment.

How to Read IR “Washout” in Photos and Fix the Setup
To read IR “washout” in photos, look for overly bright areas that lack detail or color. Common causes include overexposure and incorrect white balance. To fix your setup, use shorter exposure times and manual focus, which helps with infrared light. Also, consider a modified full-spectrum camera with an IR filter. Adjusting ISO and aperture can help too. Following these tips can improve your IR photography. Let’s explore more effective techniques together.
Key Takeaways
- Identify washout by looking for overly bright areas that lack texture or detail in your images.
- Adjust exposure times; shorter durations help maintain contrast and reduce brightness issues.
- Utilize manual white balance settings during post-processing to enhance color representation and detail.
- Capture flat-field images for consistent lighting, aiding in effective post-processing techniques.
- Use a Hoya R72 filter with your modified full-spectrum camera for better IR light management and reduced washout risk.
Understanding IR ‘Washout’ in Photography

You may be interested


Hey! So, let’s chat about infrared (IR) photography and one little hiccup you might run into: washout. This is when your photos end up looking overly bright, which can wash away detail and color saturation. Basically, you want those vibrant IR hues to pop, not disappear into a sea of white!
First off, using a filter like the Hoya R72 can really help. It works by limiting the amount of IR light that reaches your camera sensor, which makes a big difference in contrast. Think about it like wearing sunglasses on a sunny day—you can see clearly without getting blinded by the brightness.
Next up, consider your white balance. Setting it correctly is crucial! If you just rely on auto settings, your camera might misinterpret the IR light, leading to some funky color casts. If you’re working in a park bathed in IR light, try setting your white balance on the shadow or cloudy presets, and see how it affects your shots.
Also, be mindful of your exposure time. Shorter exposure times can prevent overexposure and maintain the definition in brighter areas. For example, if you’re shooting foliage, a quick snap can preserve those intricate details in the leaves rather than turning them into a bright blur.
Finally, think about your camera position. If you’re shooting on a bright, sunny day, try to avoid direct sunlight or very shiny surfaces, which can really contribute to that washout effect.
Additionally, using a camera with invisible infrared technology can reduce the risk of washout while capturing true-to-life IR images without disturbing your subject.
Anyway, understanding washout is just one part of mastering IR photography. Once you get a handle on it, you’ll be unlocking a whole new world of creative possibilities! What do you say we explore some post-processing tips next?
Recognizing Common Causes of IR ‘Washout’ for Effective Solutions
Hey there! So, let’s chat about IR washout. It can be a bit of a head-scratcher, but once you get a handle on the common causes, it becomes much more manageable. For instance, one major culprit is overexposure. Imagine taking a photo of a vibrant green landscape bathed in sunlight—those bright spots can easily drown out the intricate details you want to capture.
Another thing to keep an eye on is your white balance. If it’s off, it can make your images look flat, causing dull colors and a lack of contrast. Have you ever noticed how changing the white balance can breathe life back into a washed-out photo? It’s all about getting those colors just right. Also, remember to watch your exposure time. If it’s too long, your images might end up overly bright, losing that rich saturation you love.
If you’re using full-spectrum cameras, that’s a cool way to tackle the issue. They capture a wider range of wavelengths and can reveal more IR details, but you need to calibrate them correctly for the best results. And don’t forget about flat fielding—you should use consistent lighting for calibration, which can simplify post-processing.
Using a weather-resistant trail camera mount can help stabilize your camera setup, reducing unwanted movement that might contribute to image issues like washout.
Understanding these nuisances can dramatically improve your IR photography. Now, let’s move on to some practical tips for adjusting your settings on the fly!
Recommended Products

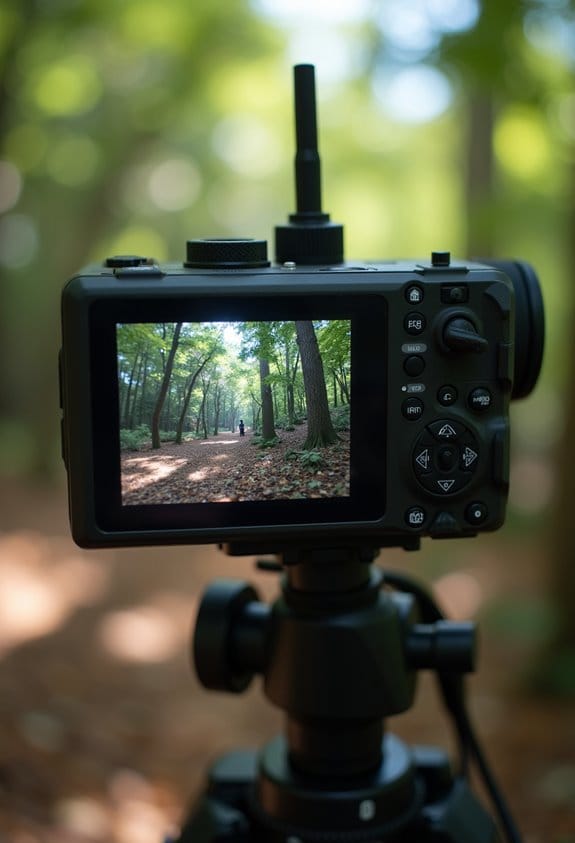
7" TFT LCD color monitor with single, double, triple and quad viewing options

MAXIMUM STORAGE & CAPACITY – 16 cubic feet of enclosed cargo space and a 200 lb load rating provide plenty of room for luggage, camping gear, tools, and more while keeping your vehicle interior clear and organized.
Spotting IR Distortion in Your Photos
Spotting IR distortion in your photos might feel a bit daunting at first, but trust me, it’s a skill we can master together! When using an IR camera, you might notice “washout,” which shows up as those overly bright spots that can really wash out details. It’s kind of like trying to see something in a bright spotlight—everything just blends together.
To get the hang of it, start by checking your bright spots. If you see areas that look almost blindingly white without any texture or detail, that’s your clue. Another thing to consider is your exposure time; for instance, if you’ve left the shutter open too long, it’s likely causing that brightness to take over the scene. And keep an eye out for color shifts—if certain colors look unreasonably bright or abnormal, that’s another sign of distortion.
One tip to improve clarity is to experiment with your camera settings. Try reducing your exposure time next time you shoot and play around with the white balance settings to bring the colors back to life. The more you practice spotting these signs, the better you’ll get at it! With these ideas in mind, we can move on to the fun part—editing your IR photos to bring out their unique beauty!
Using cameras with advanced night vision capabilities can also help minimize issues like IR washout by optimizing how IR light is captured.
Techniques to Fix IR ‘Washout’
Hey there! If you’ve noticed some IR washout in your photos, don’t worry—there are some pretty straightforward ways to fix it. First off, you might want to experiment with your exposure times. Generally, shorter exposure can really help boost contrast and reduce that washed-out look. For instance, if you’re shooting in bright sunlight, cutting the exposure down by a couple of seconds could work wonders.
Another handy tip is to adjust your white balance manually. You can use a neutral gray card, or if you’re outdoors, just focus on some greenery. Both of these can really enhance your colors and bring out more detail in your images.
Don’t forget about post-processing! Simple tweaks in editing software can make a big difference. For example, adjusting levels and curves can help clarify and improve the visual appeal of your photos. Also, capturing flat-field images right after your main shots can help ensure more consistent lighting when you’re editing later.
Lastly, be mindful of your camera distance. Keeping your camera away from reflective surfaces helps minimize unwanted light that can contribute to IR washout. Additionally, choosing cameras with quality infrared LED technology can significantly reduce washout effects and improve nighttime image clarity.
So, whether you’re photographing landscapes or portraits, these tips can go a long way in improving your results. Happy shooting!
Recommended Products

Bundle Includes: Sony Alpha a6000 24.3MP Mirrorless Digital Camera with 16-50mm Lens, Sony 55-210mm f/4.5-6.3 OSS E-Mount Lens, SF-3000 Digital Slave Flash, 3 Piece Lens Filter Kit (40.5mm), Sandisk Ultra SDXC 64GB Memory Card, Lithium Ion Battery for Sony NP-FW50, Mini Infrared Remote Control For Sony and 12-Inch Spider Tripod, Focus DSLR Camera Holster Case Bundle, Focus 52mm 2.2x Telephoto Lens, Focus 52mm Wide Angle Lens, The Corel Photo, Video, and Art Suite

RELIABLE DESIGN - The perfect commercial laptop that is both affordable and MIL‑SPEC 810H tested for sturdy build and business security. A stylish, budget-friendly alternative to the ThinkPad E16, the ThinkBook 16 brings fresh energy to modern professionals

Inside the ThinkBook 16 G6 is a power-efficient 13th Gen Intel Core i7-13700H, 14C (6P + 8E) / 20T, P-core 2.4 / 5.0GHz, E-core 1.8 / 3.7GHz, 24MB processor. This business class laptop is designed to quickly load and multitask applications. ThinkBook laptops take the ThinkPad brand in a new direction, aims to merge the best business and consumer features in one affordable package.
Camera Setup Adjustments for Enhanced IR Results
If you’re looking to improve your infrared (IR) photography, there are some essential camera setup adjustments you should consider. First off, switch your camera to manual focus. Autofocus can really struggle with infrared light, since it operates differently than what we see with our own eyes.
Another great tip is to use a full-spectrum modified camera. This allows for better capturing of wavelengths beyond 720nm, especially when you pair it with a Hoya R72 filter. Think of it like putting sunglasses on your camera that only let in the infrared light; it really enhances what you can capture!
Don’t forget about exposure times! Experimenting with various exposure lengths can help you find that perfect balance between light and shadow. For instance, you may find that a longer exposure can create more dramatic effects in your images, while too long could wash out important details.
Stability is key, too. Once you’ve set up your camera, try to keep everything in the same spot and avoid making changes, especially after taking calibration shots. This ensures consistency in your images.
Lastly, remember to adjust your white balance during post-processing. Focusing on greenery or neutral grays can really improve contrast in your photos. This little tweak can make a huge difference in how your IR images turn out!
For optimal results, also consider the impact of different infrared LED types on your camera’s night vision capabilities when setting up your equipment.
Recommended Products

Items Include: 1 x Sony FX6 Full-Frame Cinema Camera (Body Only), 1 x Lilliput A7S 7" Full HD Monitor, 1 x Sony 80GB CFexpress Type A TOUGH Memory Card, 1 x Sony MDR-7506 Hreadphones, 1 x Sony ECM-VG1 Electret Condenser Shotgun Microphone, 2 x Sony BP-U35 Battery, 1 x LED Light, 1 x Pro Camcorder Case, 1 x Deluxe Cleaning Set, 1 x HDMI Cable, 1 x Memory Card Wallet

Unopened retail packaging, sold as configured by Lenovo. One Year Lenovo Premier Support Warranty Included. Add up to 5 years of Lenovo Premier Support when you register your computer with Lenovo.

8 Channel Full UltraHD 6K / 12.0 Megapixel NVR Security Camera System with (8) 8MP 4K 2.7~13.5mm Motorized 5x Optical Zoom H.265+ Smart AI Human & Vehicle Detection Color Night Vision POE IP Cameras (Record and Playback at UltraHD 4K Resolution)
Calibrating for IR Washout Fixes in Images
If you’re struggling with IR washout in your images, let me share some tips that can really help you out. First off, make sure you’re using a modified full-spectrum camera paired with an infrared filter, like the Hoya R72. This combo works wonders in managing light wavelengths and can significantly reduce that washout effect.
Next, let’s talk about white balance. It’s super important! You might want to try setting it based on greenery or even using a gray card. This little adjustment can create better contrast in your photos, making the colors pop more vividly. For instance, if you’re photographing a lush park, setting your white balance around the greens can really enhance the scene.
Consistency is key too—if you switch up your gear, it could actually make the washout worse. Have you thought about your exposure times? Shooting during the golden hour or in shaded spots can help avoid overexposing your images.
And one last thing: if you don’t need the IR light on, turn it off! It can help you manage light intensity better. Afterward, you can use some handy post-processing tools like Siril to fine-tune your images. Its features let you extract backgrounds and adjust levels, giving your photos that perfect touch. For the best results in wildlife photography, consider cameras with 940nm no-glow technology to minimize interference and improve night vision image quality.
Recommended Products


The 0.9 density in the filter lengthens the shutter speed by uniformly reducing the amount of light entering the camera by 3 stops, allowing for shooting at wider apertures or reduced shutter speeds

The 0.3 density in the filter lengthens the shutter speed by uniformly reducing the amount of light entering the camera by 1 stop, allowing for shooting at wider apertures or reduced shutter speeds
Implement Best Practices for Future IR Photography
Hey there! If you’re looking to up your infrared (IR) photography game, I’ve got some tips that can really make a difference. First off, keeping your camera settings consistent is key. Stick to the same exposure settings each time you shoot. If you find yourself in tricky lighting situations, adjust the ISO or aperture to prevent overexposure, which can wash out your images.
Another nifty trick involves using a Hoya R72 filter if you have a full-spectrum camera. This filter allows infrared light to pass through while blocking visible light, giving your photos that dreamy, ethereal quality. Just don’t forget to tweak your white balance—doing so can really help enhance contrast and keep any colors from looking flat.
Once you’ve captured your shots, it’s crucial to address uneven illumination. You can use flat fielding techniques right after taking your images to improve consistency across your photos. And don’t hesitate to play around with exposure times; experimenting under different lighting conditions can help you find that sweet spot without getting too much ambient light.
Lastly, joining a community of fellow IR photography enthusiasts can be incredibly beneficial. You can troubleshoot problems together and share tips that can help refine your techniques. Remember, it’s all about learning and growing your skills!
Additionally, ensuring your filter’s wavelength range matches your camera and lens setup is critical for capturing the best possible images.
Recommended Products

ENHANCE YOUR PHOTOGRAPHY WITH INFRARED FILTERING - Transform your photography with the R72 Hoya Infrared 95mm Lens Filter. This IR filter allows infrared light to pass through, enabling stunning creative effects, unique contrasts that standard filters can’t achieve and opens up new photographic possibilities.

Includes Cokin X-PRO series filter holder

PRO INFRARED PHOTOS | Urth Infrared (R72) Filter Plus+ cuts all wavelengths of visible light so only infrared light (above 720nm) reaches your camera sensor. Please note, this lens filter is not compatible with cameras that have an IR blocking filter in front of the sensor.
Frequently Asked Questions
How to Fix Washed Out Film Photos?
We’ve all felt the disappointment of washed out film photos. By making careful exposure adjustments and focusing on color correction techniques, we can breathe life back into our images and revive their vibrant potential.
How to Fix Washed Out Photos on iPhone?
To fix washed-out photos on our iPhone, we can adjust the exposure in our settings, play with photo lighting, and use editing tools to enhance details. Keeping the lens clean also helps improve image quality!
How Do I Edit a Washed Out Photo?
To edit a washed-out photo, we focus on photo editing techniques, like contrast adjustment. We reduce highlights, tweak curves, and use local adjustments to restore depth and bring back vibrant details in the image.
How to Not Look Washed Out in Pictures?
To avoid looking washed out in pictures, we should focus on effective lighting techniques and choose wardrobe choices with rich colors. These strategies enhance our features and create a vibrant appearance in our photos.