As an Amazon Associate, we earn from qualifying purchases. Some links on this site are affiliate links at no extra cost to you. Our recommendations are based on thorough research and editorial judgment.
How to Aim for Animal Eyeshine vs Body Detail at Night
To capture animal eyeshine and body detail at night, we need to focus on a few strategies. Use narrow-beam flashlights to avoid overpowering glow. Adjust your camera settings, aiming for a fast shutter speed and wide aperture, to enhance visibility. Choose different light colors carefully; green light is less disruptive, while white can reveal details. Finally, get down to eye level and frame your shots thoughtfully, which can make a big difference. There’s more to explore!
Key Takeaways
- Use a narrow beam flashlight to specifically illuminate eyes while minimizing impact on body detail.
- Adjust your light intensity; lower levels highlight eyeshine without overwhelming the subject’s body features.
- Experiment with the angle of light to balance the visibility of both eyes and body without washing out details.
- Keep a respectful distance, using a telephoto lens to capture close-up images of both eyeshine and body detail.
- Utilize post-processing techniques to enhance eyeshine while carefully preserving the body details of the animal.
Understanding Eyeshine and Body Detail in Night Photography

You may be interested
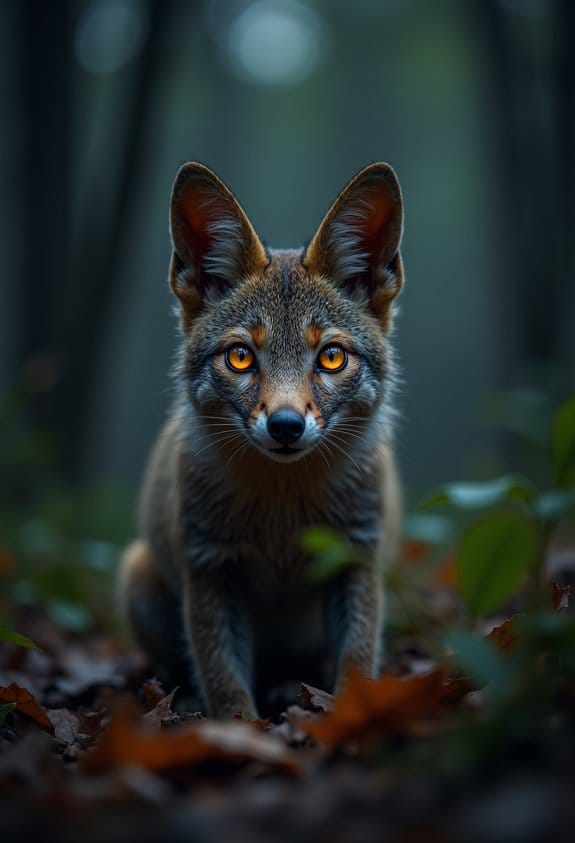
When you think about night photography, one of the coolest things to capture is eyeshine and body details of hidden animals. It’s amazing how nocturnal creatures have this unique adaptation that makes their eyes reflect light, thanks to a special layer behind their retinas called the tapetum lucidum. Depending on the species, you may notice their eyes shining in hues of green or red, which is a telltale sign that you’re looking at a nighttime critter!
Now, to spot these animals, pay attention to the height and positioning of their eyes. For instance, a deer’s eyes will be fairly high off the ground compared to a rabbit’s, which are lower. This distinction can help you quickly identify what you’re looking at.
Also, adjusting your camera settings is essential when you’re trying to capture not only the eyeshine but also the body details of these animals. A higher ISO will help you shoot in low light, and using a wider aperture can let more light in, which is super helpful.
Look out for different postures and movement patterns, too. For example, an alert fox might be sitting low to the ground, ready to pounce, while an owl could be perched quietly, scanning for prey. All these factors, combined with the mesmerizing eyeshine, can really boost your photography success.
Understanding these aspects will certainly make your night photography adventures more rewarding as you connect with the wonderful world of nocturnal wildlife. So, gear up for your next night shoot and keep an eye out for those mesmerizing shines! Using a hunting camera equipped with invisible infrared technology can help you capture these moments without disturbing the animals.
Best Techniques for Capturing Striking Eyeshine
Capturing eyeshine at night can be such a thrilling experience for photographers! When you’re out there in the dark, it’s all about finding the right balance to make those reflective eyes pop. One great tip is to use a flashlight with a narrow beam; this helps you shine just enough light on the animal’s eyes without washing out that beautiful glow.
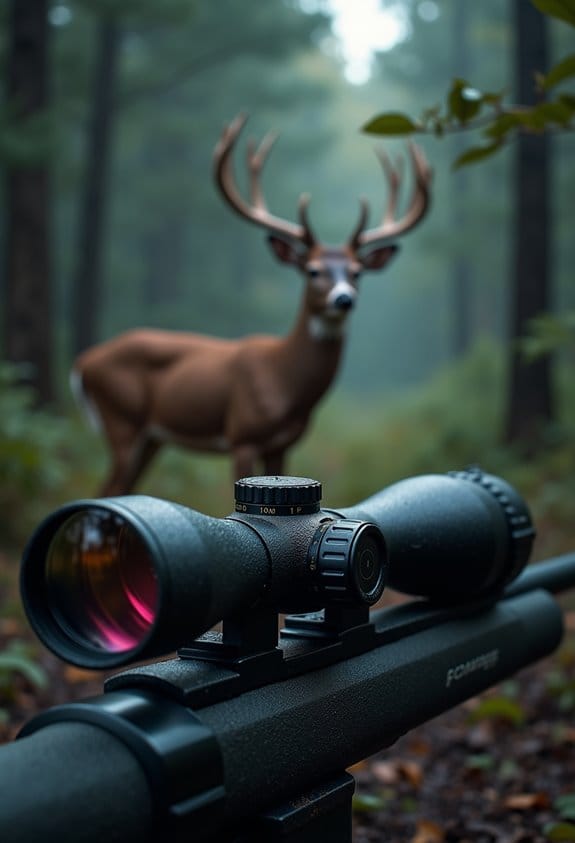
Also, consider using a camera with a fast shutter speed. This feature lets you snap clear images without any motion blur—so essential when the lighting is low. For instance, if you’re photographing a deer, a quick shutter speed will help you catch their striking eyes just as they catch the light.
Don’t forget about your aperture setting! A wider aperture lets in more light, which means the eyes will stand out vividly against the dark background. Maintain a respectful distance from the animals, maybe by using a high-quality telephoto lens. This way, you won’t disturb them, but you can still capture that captivating eyeshine.
Lastly, play around with different angles. Tilting your camera a bit can reveal the unique colors in their eyes. Each animal is different, and experimenting can yield some stunning results. Now that you have these techniques, you’re one step closer to creating amazing night vision photographs!
For the best results, using a camera equipped with low-glow infrared technology can help capture eyeshine clearly without disturbing the animal’s natural behavior.
What other wildlife photography tips are you curious about?
Adjust Your Beam Focus to Highlight Body Detail
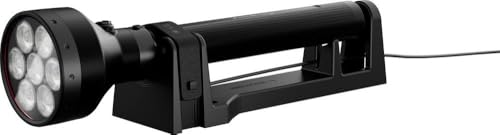
When you’re out at night, adjusting the beam focus of your flashlight can really help you see an animal’s body details more clearly. It’s all about sharpening that light so you can spot features from a distance. For instance, if you tighten the beam, you’ll create a strong hotspot that makes it easier to identify an animal’s shape and movement, whether it’s a deer gliding through the woods or an owl perched silently on a branch.
One key benefit of a focused beam is that it reveals important physical traits. Imagine you’re trying to spot a fox—having that concentrated light will highlight its fur pattern and sleek form. Plus, narrowing the beam helps cut through distractions, like the glimmers of leaves, so you can focus purely on the creature in front of you.
Lastly, don’t forget to adapt your settings to your surroundings. If it’s foggy or there’s a thick tangle of brush, play around with your flashlight’s focus until you find what works best. Getting those details right can transform your night observation adventures into something truly exciting, as you begin to recognize the unique traits of various species you come across. So, the next time you’re out, consider these tips, and you might just spot something remarkable! Using devices with advanced night vision can also significantly enhance your ability to observe wildlife in low light conditions.
Recommended Products

Ultra-Bright Performance: 200,000 lumens illuminates up to 1,618 meters, making MS32 one of the brightest LED flashlights for outdoor adventures, emergencies, and search rescue operations. Compact yet powerful design (Dimensions: 9.54" x 5.87" x 2.66", Weight: 6.83 lb) ensures reliable handling for professional and recreational use
【Incredibly Powerful】The Ledlenser P21R is our brightest rechargeable torch, delivering a staggering 12,000 lumens in a robust, heavy-duty design. Built for extreme adventures and demanding professional use: It’s ideal for trekking expeditions, night hikes and trusted by security guards, police, Search & Rescue teams, and other emergency responders. A dependable addition to your camping gear or survival kit, the P21R offers unmatched brightness, rugged durability, and high performance lighting.

Extreme Long-Range Beam - The P40 is an advanced LEP flashlight with an incredible 3,171-yard throw and up to 2,000 lumens, ideal for search-and-rescue, patrolling, and outdoor exploration.
How Light Color Enhances Night Photography Features
Hey there! If you’re looking to up your night photography game, choosing the right color of light can make a huge difference. Different light colors can enhance visibility and reveal amazing details in animal eyes, which is super important for capturing those perfect shots.
Let’s break it down. First up is white light. This is great for spotting animals from a distance because it lets you see all the finer details. Picture yourself out in the field at night, and you spot a deer from way across the way—it’s white light that helps you see its elegant features clearly.
Next, we have green light. This one’s a favorite for scanning the environment. Why? Because it’s less jarring for wildlife. You’ll notice that when you use green light, animals are often less startled, and you can clearly see the reflection of their eyes. This makes it easier to spot them in the dark, revealing a mesmerizing glow against the night backdrop.
Then there’s red light. This is perfect for those close encounters. While it won’t help you see as much detail from far away, it allows you to observe animals without disrupting their natural behavior too much. Imagine you’re slowly approaching a tiny owl on a tree branch—red light helps you keep the scene calm and still.
It’s important to remember how different intensities of light can impact animal behavior. Using lower-intensity lights is a good way to keep wildlife from bolting, while bright lights can spook them. So, experiment with these light colors to see what works best in various situations. Embracing these nuances can really elevate your night photography experience! Ready to explore different techniques?
Additionally, employing cameras with advanced IR night vision can complement your light choices by capturing clear images without the need for visible light, making nighttime photography even more effective.
Choosing the Right Equipment for Night Photography
When you’re gearing up for some night photography, picking the right equipment is crucial. Trust me, having the right tools can significantly enhance your images. First up, consider using a high-output flash unit—something with around 3000 lumens will do wonders, especially for capturing those mesmerizing eye reflections in the dark.
Now, if you really want to make those animals stand out in your shots, think about getting a Better Beamer Flash Extender. It helps concentrate the flash beam, providing better illumination for your subjects. And don’t shy away from cranking up your camera’s ISO settings. Higher ISO numbers mean your camera collects more light, which translates to clearer pictures in low-light conditions.
Another tip: using a wide aperture can be a game-changer. A larger aperture allows more light in, ensuring you capture the intricate details of the night scene. Plus, remember to bring along a sturdy tripod. It stabilizes your camera for longer exposure shots, which can mitigate any blur—especially when conditions are less than ideal.
To further improve your night shots, consider adding an IR illuminator with an 850nm wavelength to enhance visibility without disturbing wildlife.
With these tips and gear, you’ll be on your way to snapping incredible nighttime photos, all while being mindful of the animals’ natural behaviors. Now that you have your equipment set, let’s explore some techniques for positioning yourself to get the best shots out there!
Recommended Products

20.8MP FX-Format CMOS Sensor

Eband coating provides superior anti-reflection Properties, and Reduces flare and ghosting

Bundle Includes: 4 x Stealth Cam 2022 G42NG 32MP No Glow Trail Camera (Kryptek Camouflage), 4 x Economy Trail Camera Holder, 4 x 32GB Ultra SDHC UHS-I Memory Card, and USB 2.0 Card Reader
What Affects Visibility? Key Environmental Factors at Night?
When you’re out exploring the great outdoors at night, you might be surprised at how much the environment can affect your visibility. Factors like fog, mist, and even humidity can really scatter light and blur the outlines of objects around you, making it hard to see what’s ahead. Imagine trying to walk through a dense fog—everything just looks fuzzy and distant.
Snow and frost can change the game too. They increase glare, which can make it tough to identify objects or navigate your terrain. For example, if you’re walking on a snowy path, that bright white surface might dazzle your eyes, making it hard to see where you’re stepping.
And let’s talk about light color—this plays a significant role in visibility at night. White light is great for revealing details when you’re looking for something specific, like tracking an animal. However, if you’re in a wildlife-rich area, using a green light can be really helpful. It’s less likely to disturb the animals around you while still providing decent visibility.
Also, keep in mind that the density of vegetation can affect how light penetrates your surroundings. When exploring thicker woods, it might be best to adjust your night hunting lighting to make sure you can accurately see what’s around you. Understanding these factors isn’t just about seeing better; it’s about making smart choices to stay safe while enjoying the night outdoors.
Next time you venture out, consider these environmental factors as part of your plan. They’ll help you prepare better and enhance your nighttime adventures! Using infrared flash technology in cellular cameras can also improve the accuracy of night visibility without disturbing wildlife.
Tips for Positioning and Framing Your Night Photography Shots
If you want to capture stunning night photographs of animals, positioning and framing your shots are key. Start by getting down to eye level with the creature. This approach isn’t just about getting the right angle; it creates a connection that draws the viewer’s attention straight to the animal’s eyes. For example, if you’re photographing a deer, kneeling down can make those big, expressive eyes pop in your image.
Next, think about framing your shot. Including elements from the animal’s habitat adds context and tells a story about where it lives. If you’re capturing a fox, try to include some brush or trees in the background. This gives your audience a sense of the creature’s environment.
Using ambient light wisely can really enhance your photographs too. Keep your ISO low, around 800 to 1600, to maintain the soft hues that night photography offers without introducing too much noise. This way, the colors in your image stay rich and beautiful.
And don’t forget about depth of field! Using a wide aperture, like f/2.8, helps you focus on the animal’s eyes while softly blurring the background. This technique makes the eyes shine and stand out even more, adding a touch of magic to your photograph.
For effective nighttime shots, using no glow infrared technology can capture clear details without startling your subject.
Recommended Products

INCLUDES Two Tactacam Reveal Ultra Cellular Trail Cameras, Two Tactacam Reveal Folding Solar Panels, Two Reveal Lipo Lithium Battery Packs, Two 32GB Lexar SD Cards by Trail Cams Galore, a Trademarked Brand.

[Crystal Clear Capture, Day or Night] Capture 8MP high resolution photos and 60-second HD videos with sound, ensuring every rustle or movement in the wild is recorded in high detail. Whether you're hunting, scouting wildlife, or monitoring remote property, media is sent directly to your phone through the Spartan Camera Management App anytime, anywhere.

2 x WiseEye Data Cam 2 No Glow Trail Camera - The WiseEye Data Cam 2 No Glow Trail Camera (DC-2) is a versatile and powerful tool for monitoring wildlife and outdoor surveillance. Featuring a nearly invisible No Glow infrared flash, the DC-2 ensures discreet observation without alerting subjects to its presence, making it ideal for capturing candid nighttime images. This advanced trail camera also boasts ActionShot video recording, allowing users to capture up to 5 minutes of high-definition video on demand through the HuntControl app, perfect for documenting wildlife activities or securing footage of intruders.
Avoid These Mistakes in Eyeshine and Body Detail Photography
Hey there! If you’re getting into night photography, particularly with capturing eyeshine and body details, there are some common mistakes you definitely want to avoid. Once you’ve got your positioning and framing down, let’s talk about those tricky little pitfalls that can sneak into your shots.
First off, let’s discuss flash or spotlight brightness. You really want to keep that balanced. If your flash is too bright, it can wash out the details of the body while making the eyes shine too much. Think of it like a good recipe; too much salt can ruin a dish! Try experimenting with a lower flash setting or using a diffuser to soften the light.
Another key point is to shoot at eye level with the animal. Why? Because capturing their eyes straight on showcases their reflective quality so beautifully. Imagine a photo where you can see both the glimmer in their eyes and the surrounding details. It makes all the difference!
And don’t overlook shutter speed. You’ll want to use a faster shutter speed to freeze the action and avoid any blur from those glowing eyes. For instance, if you’re shooting a nocturnal animal moving slowly through the underbrush, a shutter speed of 1/250th of a second can help keep things crisp.
Adjusting your light gradually is also essential. Sudden changes can startle your animal subjects, which can lead to missed shots or erratic movements. I usually suggest pointing your light away first to let the animals acclimate before bringing it back gently.
Next, think about your angle and distance. Getting too close can create harsh shadows that distract from the image. Too far away, and you risk losing that magical eyeshine altogether. Try to find that sweet spot where the glow from their eyes and body detail balance perfectly.
Keeping these tips in mind will really elevate your night photography game. Now, let’s move on to how you can maximize those eye-catching moments once you’re set up!
Using a cellular trail camera with night vision can also help you monitor animal behavior remotely without disturbing them, giving you better opportunities to capture those perfect shots.
How to Review and Edit Your Night Photos for Maximum Impact
When you’re reviewing and editing your night photos, the goal is to make them truly captivating for your viewers. Let’s start with a few simple techniques to boost the quality of those nighttime shots. First, consider using a high ISO setting and a wide aperture—this allows more light into the camera, which helps bring out the details in your subject’s eyes and body. For instance, if you’re photographing a pet, their eyes can really pop under these settings, making them look lively and engaging.
Next up is shutter speed. You’ll want to keep it fast to avoid camera shake, which is especially important in low-light conditions. This ensures that your focus is sharp and those reflective eyes shine brightly. For example, if you’re capturing your cat at night, a quick shutter speed prevents any blurriness that can occur if they move suddenly.
Once you’ve captured your images, moving into post-processing is where the magic happens. If you’re using software like Photoshop, play around with tools like Pet Eye Removal to control any shine in the eyes but keep it bright and appealing.
And don’t forget to balance the shadows and highlights in your images. This step can really allow your subject to stand out against the backdrop, while also emphasizing that radiant eye shine. For example, if you shot your dog outside at night, tweaking these settings can make them stand out sharply against the dark background.
Lastly, when you’re on location, using high-lumen flashlights can help reveal more details in your subjects. This extra light can provide a lovely contrast in your photos, allowing for a more vibrant feel. Incorporating these tips means you’ll be well on your way to creating striking night photos that truly connect with viewers. Now that you’re equipped with these techniques, it’s time to get out there and capture some magic! Enhancing your workflow by accessing real-time alerts from cellular wildlife cameras with app control can also help you capture perfect moments during nighttime.
Frequently Asked Questions
What Color Light Is Best for Hunting Coyotes at Night?
The best color light for hunting coyotes at night’s green. It enhances our night vision, complements predator habits, and minimizes wildlife camouflage. Infrared heat is another option, but green’s stealth helps optimize our hunting tactics.
What Color Do Animals’ Eyes Glow at Night?
Like jewels glistening in the dark, nocturnal animals’ eyes glow in species-specific colors due to eyesight adaptations and their reflective tapetum lucidum, revealing a dazzling array influenced by light wavelength effects.