As an Amazon Associate, we earn from qualifying purchases. Some links on this site are affiliate links at no extra cost to you. Our recommendations are based on thorough research and editorial judgment.
IR Hotspots Explained: Why the Center Looks Brighter
IR hotspots appear as bright circles in the center of your infrared photos. This happens because infrared light interacts uniquely with your camera’s lens and sensor. Here are key reasons why they occur:
- Light reflections in the lens
- Camera aperture settings
- Infrared light’s special behavior
You may be interested


These factors create the hotspots, often affecting colors too. If you’re curious about how to manage their impact, there’s more to uncover!
Key Takeaways
- Infrared hotspots appear brighter in the center of images due to lens and sensor interactions with infrared light.
- Reflections within the camera lens contribute significantly to the formation of these bright circles.
- Smaller aperture settings tend to intensify the visibility of hotspots due to diffraction effects.
- Lens coatings play a crucial role in managing hotspots, with matte black coatings sometimes reflecting infrared light.
- Adjustments in aperture and focus techniques can help control the prominence of hotspots during infrared photography.
What Are Infrared Hotspots and Why Do They Occur?
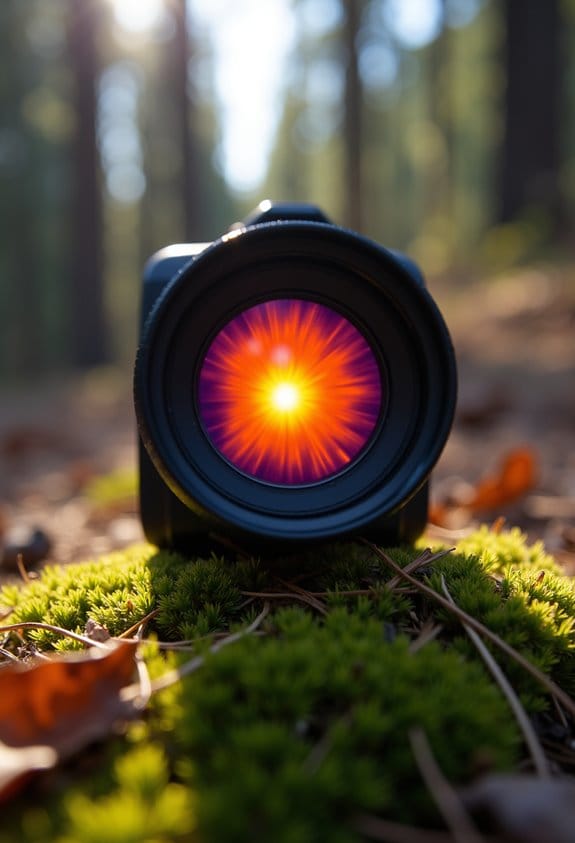
Have you ever looked at your infrared photos and spotted those strange bright circles? Those bright spots are known as infrared hot spots, and they can be quite the curiosity! They usually show up right in the center of your images, and they occur because of how infrared light interacts with your camera’s lens and sensor. Let’s break it down a bit.
Firstly, one of the main culprits behind infrared hot spots is light reflections within your lens. Think about it: camera lenses are made up of multiple elements, and sometimes the light bounces around in ways we don’t expect. For instance, if your lens has a matte black coating intended to absorb light, it might actually reflect infrared light back into the image.
Another factor is the aperture setting on your camera. When you use a smaller aperture, less light gets in, which can make those hot spots stand out even more. And it’s interesting to note that these hot spots often impact the color channels of your photo, particularly the blue channel, which can give your image a weird tint.
This phenomenon can be influenced by the wavelength of the infrared light, such as 940nm invisible IR LEDs, which are specifically designed to minimize disturbance and interference in night images.
How Do Lens Coatings Contribute to the Formation of IR Hotspots?
Lens coatings play a vital role in photography, especially in infrared images where things can get a bit complicated. When we talk about IR hotspots, that’s where these coatings make a significant difference! For example, matte black coatings are designed to absorb stray light, but they can sometimes reflect infrared light, leading to those pesky hotspots.
When using glass that interacts with infrared light, it doesn’t always behave as you might expect. This can result in unpredictable reflections and exacerbate the hotspot issue. Multi-coatings can also introduce white spots in your images, especially if the coatings weren’t optimized properly. To avoid these problems, investing in high-quality lenses is essential; good materials can really reduce those hotspots and improve overall image quality.
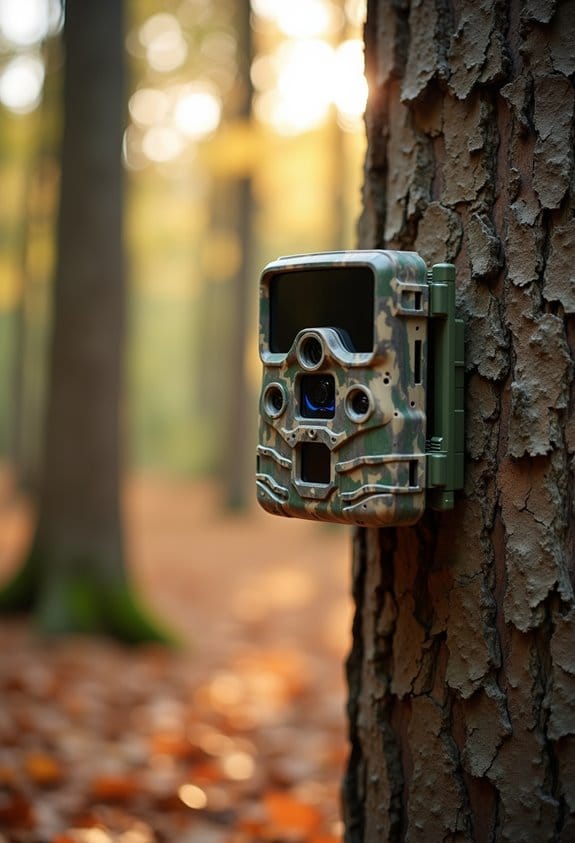
It’s also crucial to test your lenses under different light spectrums. This gives you a clearer picture of how the coating holds up and how it will impact your infrared photography. So, when you’re choosing a lens, keep coatings in mind to better manage those IR hotspots and elevate your infrared imaging experience. Additionally, some advanced trail cameras incorporate low-glow infrared night vision technology to minimize unwanted reflections that contribute to hotspots.
Recommended Products

Product Type:Precision Measuring

Innovative magnetic protection system: Stronger inlaid ring and pop-off magnetic design, prevent lens scratches and filter from getting stuck on the lens.

★High Transparency: Germanium lenses offer exceptional infrared transparency, making them ideal for thermal imaging and thermometer applications.
Effective Strategies to Reduce IR Hotspots
If you’re looking to tackle those pesky IR hotspots in your infrared photography, I’ve got some solid strategies that can really make a difference. First off, using high-quality lenses specifically designed for IR photography is essential. They often come with coatings that help reduce those annoying hot spots. For example, some photographers swear by certain brands that are known for their sharpness and minimal flare.
Another effective tip is to add lens hoods to your gear. These handy accessories help block stray light that can highlight hotspots, so they’re definitely worth having in your toolkit. You might also want to play around with your camera’s aperture settings. While it’s tempting to stick to a favorite, remember that smaller apertures can actually increase hotspot intensity. Try experimenting with different settings until you find what works best for your style.
And don’t forget about keeping your filters clean! A little dust or smudge can be enough to create hotspots in your images, so give them a regular wipe down for the best results. It’s also a good idea to do some research on lenses that the photography community raves about for their ability to keep hotspots at bay. Plus, adjusting your white balance for infrared can help keep your colors accurate, so don’t overlook that step!
Another angle to consider is securing your camera on a stable adjustable mount, as this reduces unwanted movement that can contribute to variations in IR hotspot appearance.
All these techniques can really enhance your infrared photography experience. Once you’ve tackled these aspects, you’ll be feeling way more confident about capturing those stunning IR images.
Recommended Products

Bundle Includes: 1 x Canon XA60 Professional UHD 4K Camcorder, 1 x Lilliput A7S 7" Full HD Monitor, 1 x Sony ECM-VG1 Electret Condenser Microphone, 2 x SanDisk SecureDigital 64GB Extreme PRO Memory Card, 2 x BP828 Replacemnt Battery, 1 x BP820 Replacement Charger, 1 x 58mm 3 Piece Filter Kit, 1 x Professional Heavy-Duty Aluminum Tripod, 1 x Soft Bag, 1 x LED Light, 1 x 58mm Wide Angle Lens, 1 x 58mm Telephoto Lens, 1 x Memory Card Reader, 1 x High Speed Mini HDMI to HDMI Cable and more..
Bundle Items Include: 1 x Canon XA60 Professional UHD 4K Camcorder, 1 x Lilliput A7S 7" Full HD Monitor, 1 x Sony ECM-VG1 Electret Condenser Microphone, 2 x SanDisk SecureDigital 64GB Extreme PRO Memory Card, 2 x BP828 Replacemnt Battery, 1 x BP820 Replacement Charger, 1 x 58mm 3 Piece Filter Kit, 1 x Professional Heavy-Duty Aluminum Tripod, 1 x Soft Bag, 1 x LED Light, 1 x 58mm Wide Angle Lens, 1 x 58mm Telephoto Lens, 1 x Memory Card Reader, 1 x High Speed Mini HDMI to HDMI Cable and more..

Bundle Includes: 1 x Canon XA60 Professional UHD 4K Camcorder, 1 x SanDisk SecureDigital 64GB Extreme PRO Memory Card, 1 x BP828 Replacemnt Battery, 1 x BP820 Replacement Charger, 1 x 58mm 3 Piece Filter Kit, 1 x Soft Bag, 1 x LED Light, 1 x 58mm Wide Angle Lens, 1 x 58mm Telephoto Lens, 1 x Memory Card Reader, 1 x High Speed Mini HDMI to HDMI Cable, 1 x Memory Card Wallet, 1 x Lens Cap Keeper, 1 x Cleaning Kit
Understanding the Impact of Aperture and Focus Techniques on Hotspots
Hey there! If you’re getting into infrared photography, understanding how aperture and focus techniques play a role in hotspots is super important for capturing those breathtaking images you’re after. For instance, using a smaller aperture like f/8 can lead to sharper hotspots, thanks to something called diffraction.
Now, let’s talk focusing. It’s a bit tricky with infrared light; it behaves differently than what we see with our eyes. This can throw off your focus and might even make those pesky hotspots stand out more than you’d like. A practical tip is to use live view if your camera supports it, as it can help to ensure you’re precisely on target.
Also, keep in mind that adjusting the f-number can completely change how hotspots look in your shot. If you crank it up too much, you might end up with hotspots that are more pronounced, and that can take away from the overall sharpness of your image. It’s all about finding that sweet balance!
When shooting outdoors, choosing equipment with weather-resistant features helps maintain image quality by protecting your gear from environmental factors.
Recommended Products

👍【REACH NEW FRONTIERS】Autel Robotics EVO Max 4T V2 perfectly integrates a wide camera, Zoom Camera, L~aser R~angefinder, and T~hermal Camera. Ultra-sensitive wide-angle camera supports 48MP 1/2" CMOS, max ISO 64000, Moonlight Algorithm 2.0 allows capturing crisp even in low-light environments. Zoom Camera supports 48MP 8K 10x optical zoom (160x Max). L~aser R~angefinder's Measuring Range: 16.4–3737 ft, Measuring Accuracy: ± (1 m + D×0.15%). T~hermal Camera with 640*512 30Hz t~hermal imaging and 9.1mm focal length and 16x digital zoom.

STUNNING VIDEO QUALITY – The Canon CR-N500 Remote PTZ camera delivers advanced performance and outstanding 4K 30p and Full HD 60p video output thanks to a 1" CMOS sensor, DIGIC DV 6 image processor, and Dual Pixel CMOS AF for fast, reliable, and precise auto focus

8-Megapixel with 3840x2160 Ultra High Resolution 4K Video & Audio 32 Channel 6K 12MP NVR Security Camera System with (32) 4K (8MP) Weatherproof 2.8-12mm Motorized Zoom H.265+ PoE IP Bullet Camera
How to Fix Common Infrared Photography Problems?
If you’re venturing into infrared photography, you might hit a few bumps along the way. But don’t worry; fixing common infrared photography problems is totally manageable with a few tips and tricks! For starters, always opt for high-quality lenses since they’re made to capture the IR spectrum efficiently. This means fewer annoying hot spots and reflections that can ruin an otherwise stunning shot.
Another simple yet effective adjustment is to use a lens hood. It’s a small accessory that can make a big difference by blocking out stray light, which is often the culprit behind unwanted reflections in your images. And when it comes to your aperture settings, tread carefully. While a smaller aperture can sharpen your images, it might inadvertently amplify hot spots, so find a balance that works for your scenes.
Don’t forget to keep your filters squeaky clean! Even a bit of dust can leave behind distracting spots in your photos, so ensure your IR filter is snug and sealed. And here’s a neat tip: when you edit your images, converting them to black and white can help minimize those pesky color shifts you might encounter.
For enhanced clarity in low light conditions, consider using cameras equipped with low-glow infrared technology to reduce hot spot effects and achieve more natural nighttime images.
With these strategies in your toolkit, you’re well on your way to capturing incredible infrared photos. Ready to tackle those unique IR landscapes next?
Recommended Products

Bundle Includes: 1 x Canon XA60 Professional UHD 4K Camcorder, 1 x SanDisk SecureDigital 64GB Extreme PRO Memory Card, 1 x BP828 Replacemnt Battery, 1 x BP820 Replacement Charger, 1 x 58mm 3 Piece Filter Kit, 1 x Soft Bag, 1 x LED Light, 1 x Memory Card Reader, 1 x High Speed Mini HDMI to HDMI Cable, 1 x Memory Card Wallet, 1 x Lens Cap Keeper, 1 x Cleaning Kit

Bundle Includes: 1 x Canon Vixia HF G70 UHD 4K Camcorder (Black), 1 x SanDisk SecureDigital 64GB Extreme PRO Memory Card, 2 x BP828 Replacemnt Battery, 1 x BP820 Replacement Charger, 1 x 58mm Graduated Color Filter Kit, 1 x 58mm 3 Piece Filter Kit, 1 x Soft Bag, 1 x 58mm Wide Angle Lens, 1 x 58mm Telephoto Lens, 1 x Memory Card Reader, 1 x Led Light, 1 x 12 inch Flexible Tripod, 1 x High Speed Mini HDMI to HDMI Cable, 1 x Memory Card Wallet, 1 x Lens Cap Keeper, 1 x Cleaning Kit

4K UHD Professional Camcorder 4K UHD / 25P - MP4 up to 150Mbps and XF-AVC up to 160Mbps
Frequently Asked Questions
What Do the Colors in Infrared Image Depend On?
The colors in infrared images depend on the infrared spectrum, sensor sensitivity, and thermal variations. By using color mapping and proper image calibration, we can effectively depict heat distribution, enhancing our understanding of various subjects.
What Do the Colors in This Thermal Infrared Image Indicate?
The colors in this thermal infrared image indicate thermal signature analysis, highlighting heat sources through infrared wavelength range. They correlate with color temperature, aiding in heat source identification for various thermal imaging applications, relying on infrared emission principles.
How to Focus Infrared Photography?
To focus infrared photography effectively, we should consider focal length adjustments, utilize infrared filters, and carefully set exposure settings. We must also pay attention to camera settings and subject distance for ideal results.
What Colors Show up in Infrared?
In the whimsical domain of infrared photography, we delight in capturing vivid hues. The infrared spectrum reveals color wavelengths beyond visible light, transforming our images, showcasing heat emissions, and highlighting vegetation’s vibrant life through imaging technology.