As an Amazon Associate, we earn from qualifying purchases. Some links on this site are affiliate links at no extra cost to you. Our recommendations are based on thorough research and editorial judgment.
How Trail Cameras Detect Motion: PIR Sensors Explained Simply
Trail cameras use PIR (Passive Infrared) sensors to detect motion by sensing infrared radiation, which warm bodies emit. Here’s how it works:
- The dual sensors pick up heat changes.
- A special lens helps focus this heat, improving accuracy.
You may be interested


When you pass by, the camera captures your movement, taking photos or videos. Sensitivity settings can be adjusted to avoid false triggers, like rustling leaves. If you’re curious, there’s more to explore about optimizing your camera setup!
Key Takeaways
- Trail cameras use PIR (Passive Infrared) sensors to detect infrared radiation emitted by warm bodies, allowing them to monitor motion effectively.
- Dual pyroelectric sensors enhance the accuracy of motion detection by discerning temperature changes and movement in the environment.
- The Fresnel lens helps focus infrared energy onto the sensor, increasing sensitivity and expanding the detection range from 10 to 150 meters.
- Sensitivity settings can be adjusted based on environmental conditions to minimize false alerts and ensure optimal performance during various activities.
- Regular calibration and maintenance are crucial for aligning camera performance with specific conditions and maximizing detection efficiency.
Understanding Trail Cameras: Definition and Functionality

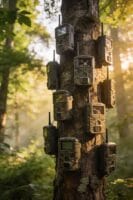
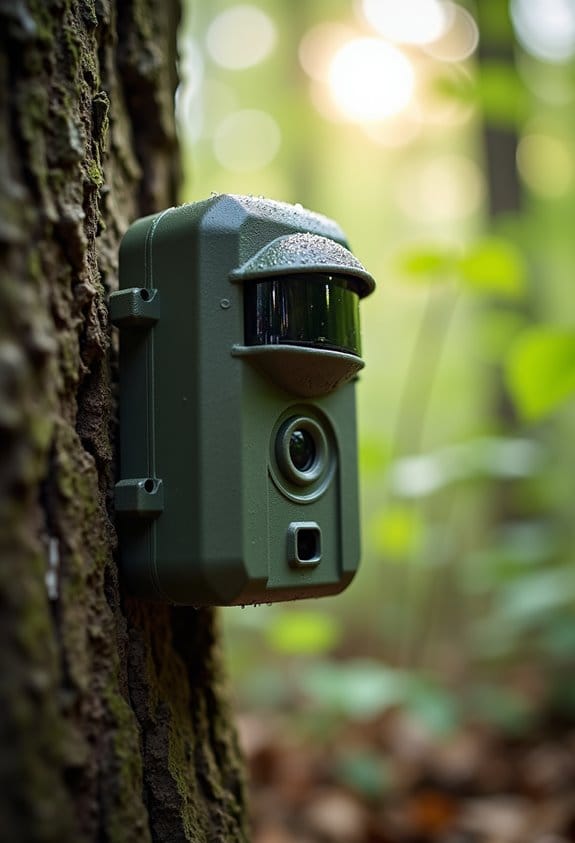
When you picture trail cameras, think of them as little watchful eyes keeping an eye on the forest or your backyard. These handy devices use batteries to snap photos or record videos of wildlife and even unsuspecting visitors. They’re made up of a few key parts that work together to capture what’s happening in their field of view.
First up is the PIR motion sensor. This nifty piece detects motion by picking up infrared radiation emitted by warm bodies, like deer or even a curious raccoon. Then, when that motion is sensed, the image sensors spring into action to record what’s happening. You can even adjust the PIR sensitivity settings to minimize the chances of false alarms—so your camera won’t go off every time a breeze rustles the leaves.
Trail cameras sit in standby mode until they detect movement, which helps conserve battery life. Depending on the setup, they can usually spot something moving from 100 to 130 feet away. People often use trail cameras for tracking wildlife on their lands, monitoring their property for unwanted visitors, or even capturing stunning time-lapse videos of nature changing throughout the seasons.
It’s fascinating to think about all the moments you can capture with one of these cameras, whether it’s a deer munching on grass or a flicker of light from a passing car. If you’re wondering about the best placement for your trail camera, that’s a whole other fun aspect to explore! Durable and weather-resistant materials used in mounts ensure your camera stays securely in place through various outdoor conditions.
How Do PIR Sensors Work in Trail Cameras?
Hey there! So, you know those trail cameras that capture all sorts of wildlife action? Well, they rely on PIR sensors to do their magic. These sensors are pretty neat because they can detect infrared radiation coming from warm bodies, like animals or even humans, without actually sending out any energy themselves.
Let’s break it down a bit. PIR sensors use a special setup called dual pyroelectric sensors. What that means is they can pick up changes in temperature, which allows them to sense movement when an animal walks by. There’s also this cool Fresnel lens that helps focus infrared energy onto the sensor, making it even more sensitive. Think of it like a pair of glasses that help the sensor see better in the infrared spectrum.
Typically, these sensors can detect motion anywhere from 10 to 150 meters away, but the exact range can depend on a few factors, like environmental conditions. Plus, many trail cameras allow you to fine-tune the sensitivity settings. This is great for avoiding false alarms—like when a stray cat wanders by instead of the deer you’re hoping to catch on film. Many advanced trail cameras also feature IP65/IP66 weather resistance, ensuring reliable operation in harsh outdoor environments.
How Do PIR Sensors Detect Motion in Trail Cameras?

Have you ever been curious about how trail cameras actually know when something’s moving around? It all comes down to PIR sensors! These little gadgets detect motion by picking up infrared radiation, which is basically the heat given off by warm bodies—like animals or even us humans.
So, here’s the scoop: the PIR sensor has a dual-sensor setup that helps it pick up on temperature changes. It also uses a special lens called a Fresnel lens that focuses that infrared radiation right onto the sensor, making it super sensitive and accurate when it comes to detecting movement. For instance, if a deer wanders into the camera’s detection zone—usually between 10 to 150 meters—the sensor sends a signal, and bam, the camera starts snapping pictures!
However, it’s important to note that things like the temperature of the surroundings and the nearby plants can influence how well the sensor works. That’s why getting the sensitivity settings just right can make a big difference. This tech is not just cool for wildlife watching; it’s also handy in security setups, ensuring you catch every little movement happening in your area.
Additionally, many cellular trail cameras provide instant alerts sent to your phone whenever motion is detected, keeping you updated in real time.
As we explore more about trail cameras, we can look into how to choose the right one for your needs!
Why You Should Care About PIR Sensitivity
Hey there! If you’re using a trail camera, understanding PIR sensitivity is super important for capturing those action-packed moments you want to see. Basically, PIR sensitivity tells us how well motion sensors can pick up changes in infrared radiation, which is crucial for detecting movement.
Let’s break it down a bit. When you have high sensitivity on your camera, it becomes a lot better at spotting small or distant movements—think of those sneaky deer or small critters that tend to stay hidden. On the flip side, if the sensitivity is set low, you can avoid those annoying false alerts triggered by things like rustling leaves or a warm breeze. It’s all about finding that sweet spot!
And here’s a handy tip: Many cameras come with adjustable PIR settings. This feature lets you tweak the sensitivity based on your surroundings. If you’re in a thicker forest with lots of foliage, you might want a lower sensitivity to prevent the camera from going off with every breeze. But if you’re set up in an open field, cranking the sensitivity up can help catch those quick movements from animals far away.
Understanding this can really enhance your wildlife monitoring experience. So, knowing how to adjust your PIR sensitivity can make a huge difference in what you actually capture. Additionally, pairing proper PIR sensitivity with a camera’s trigger speed ensures you don’t miss fast-moving wildlife. Ready to set up your camera and start observing the wild?
Recommended Products

Includes Two Stealth Cam Revolver Cellular Trail Cameras, Two Stealth Cam Adjustable 29"-49" Mounting Post, Two Stealth Cam Durable Solar Battery Packs, and Field Boys Microfiber Cleaning Cloth by Trail Cams Galore, a Trademarked Brand.

Includes Four Stealth Cam Fusion X-Pro Dual Sim Trail Cameras and Microfiber Cleaning Cloth by Field Boys, a Trademarked Brand.
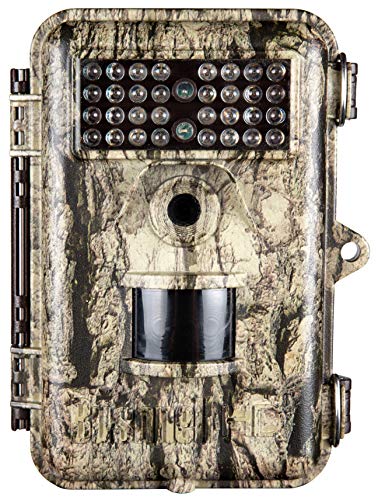
[BUSHNELL TROPHY Trail Camera] is a trusted line of trail cameras from a USA company that has been serving the outdoor and wildlife enthusiast for years.
How to Reduce False Triggers in Trail Cameras
Hey there! If you’re like me, those pesky false triggers from trail cameras can be really frustrating, right? Luckily, I’ve got some simple tips to help you avoid those annoying moments and get the best shots of wildlife.
First off, consider adjusting the PIR sensitivity. When it’s windy, for example, crank down the sensitivity a bit to avoid capturing every little movement from the swaying leaves. It can save you a ton of empty photos!
Next, think about where you’re mounting your camera. Placing it at a height of about 2-3 meters and angling it down at roughly 45 degrees can improve your chances of getting some awesome wildlife snapshots. Imagine catching a deer in its natural habitat instead of just a passing squirrel!
Another key point is to keep your camera away from heat sources. If you put it too close to direct sunlight or warm rocks, the heat can mess with the sensors and trigger false captures. Setting your camera in shaded areas, especially during hot days, can help with this.
Also, make use of the trigger interval setting. You can set it to wait longer between captures, which means you’ll capture less redundant photos and cut down on those false alarms.
Regularly checking the area around your camera is crucial too. Sometimes, branches or even small animals can set off the sensors. If you see a lot of photos that aren’t what you’re looking for, don’t hesitate to adjust the camera’s position.
For enhanced reliability, consider investing in smart detection features with adjustable PIR sensors available on advanced trail cameras.
Understanding Detection Range and Types of PIR Sensors
Have you ever noticed how the detection range and types of PIR sensors can really impact the effectiveness of your trail cameras? It’s fascinating to think about how these little details can make a big difference in capturing the action on your adventures.
Let’s break it down a bit. Indoor PIR sensors usually have a detection range between 25 centimeters and about 20 meters, which means they’re great for smaller spaces like your home or garage. On the flip side, outdoor PIR sensors can cover from 10 meters to a whopping 150 meters, perfect for monitoring larger areas like yards or wilderness trails. This means if you’re setting up a camera in a wide-open space, you’ll definitely want an outdoor sensor to catch all the movement.
When it comes to types, there are different options. For indoor setups, you might consider a curtain-type PIR sensor, which is great for creating a specific detection zone. If you’re outdoors, think about passive infrared curtain detectors—they can help you spot motion in a designated area without triggering all the time. One tip: when setting your camera, try positioning it at a 45-degree angle to the trail. This tweak can greatly enhance what you capture.
Lastly, keep in mind that the temperature difference between the environment and whatever you’re trying to detect plays a crucial role in detection. If you notice the sensitivity isn’t quite right for the weather, don’t hesitate to adjust those settings! With a little time and effort, you can optimize your setup for better pictures and more exciting wildlife encounters. Using cameras equipped with advanced detection technology can significantly improve capture accuracy. Now, let’s chat about how to choose the perfect location for your camera!
Environmental Factors Affecting Motion Detection
Hey! So, let’s chat about how environmental factors can impact the motion detection of your trail camera. It’s pretty fascinating when you think about it! For starters, temperature plays a big role. PIR sensors, which are the brains behind motion detection, actually work best in cooler temperatures. If it gets too warm, you might find that your camera struggles to catch bigger animals because the detection range shrinks.
Another thing to consider is obstructions. If there are lots of leaves or structures in the way, they can block the infrared signals that the camera relies on, making it tough for it to detect movement. For instance, if you place your camera near a dense thicket, you might miss out on capturing those elusive critters.
Positioning is another crucial element—you want to get your camera about 2-3 meters high. This height allows it to get a clearer view and improves overall performance. Plus, play around with the sensitivity settings! For example, if you’re in an open field, cranking it up will work well, but if you’re in a wooded area, dialing it down can minimize those pesky false triggers from swaying branches.
Speaking of false alerts, keep an eye on where the sun hits your camera during the day. Direct sunlight can trick the PIR sensor into thinking there’s movement, sending you unnecessary alerts. Adjusting your setup with these insights can really boost your camera’s efficiency. Also, choosing a model with advanced motion detection features can help reduce false triggers significantly. So, ready to set out your camera with this in mind? Let’s see what nature has in store!
Night Illumination Technologies in Trail Cameras
You know, when it comes to trail cameras, night illumination technologies play a huge role in what we can capture after the sun goes down. If you’re planning to monitor nighttime activity, you have some cool options to consider.
First up is Red Glow, or visible infrared. This type of light can be seen by both humans and animals, which might send some critters running for the hills when they see that flash. On the other hand, there’s No Glow, which uses invisible infrared light. It’s sneaky enough that animals won’t even notice it, allowing them to act naturally while you get the shots you want. Just think about it: a deer might bolt at the sight of a Red Glow, but it won’t even flinch with No Glow technology.
Then there’s White Flash, which gives you colorful images, but it often alarms wildlife. Imagine trying to photograph a family of raccoons rummaging through the woods, only to have them scatter at the bright light.
The choice of night illumination can truly affect the quality of your images. If you want higher resolution and better detail, Red Glow might be your go-to. But if you prefer being stealthy, No Glow is your best friend. These technologies work hand in hand with motion sensors to help you monitor wildlife effectively without interruption. Many no glow cameras also feature quick trigger speeds, which are essential for capturing fast-moving animals in low light conditions.
Tips to Optimize Your Trail Camera Setup
Hey friend! If you’re thinking about setting up trail cameras, it’s crucial to make them as effective as possible to snag all those incredible wildlife moments. Let’s chat about some practical tips that can really help.
First up, let’s talk about height and angle. Aim to place your trail camera around 2 to 3 meters (that’s about 6 to 10 feet) off the ground and angle it down at around 45 degrees. This positioning can make a huge difference because it boosts the PIR sensor‘s ability to detect motion on those busy game trails. Imagine catching that perfect shot of a deer or a curious fox!
Next, consider your sensitivity settings. In areas with a lot of dense foliage, set the sensitivity to medium. This can help cut down on those pesky false alarms you get from swaying branches or rustling leaves. On the flip side, in more open spaces, crank that sensitivity up high so you don’t miss any wildlife action. For example, if you have a trail camera on a wide-open path, having higher sensitivity will help capture fast-moving animals.
Don’t forget about environmental factors! If a storm is rolling in, or it’s really windy, you might want to lower the sensitivity once again. This adjustment can keep your camera from picking up all the unnecessary movements that come with blustery weather.
Lastly, make it a habit to regularly test and tweak** your camera settings. After you set it up, check the footage it captures. If you find it’s missing some action or getting too many false triggers, make those adjustments** to ensure it’s working at its best.
Also, remember that using cameras with 4G LTE connectivity can help you monitor your setup remotely and receive instant alerts without needing to be physically present.
Setting up a trail camera can be a bit of a learning curve, but getting the basics right can lead to some amazing wildlife discoveries. Ready to explore the best locations to set up next?
Frequently Asked Questions About Trail Cameras and PIR Sensors
Have you ever stopped to think about how trail cameras snap those incredible wildlife photos? It all comes down to PIR sensors, which are pretty fascinating! These sensors pick up motion by sensing infrared radiation from warm bodies. So, when an animal wanders into the camera’s view, the sensor detects that heat and triggers the camera.
Let’s throw some common questions your way. First up, how do you adjust sensitivity settings? Well, if you turn up the sensitivity, the camera can catch even the smallest or quickest movements—great for spotting sneaky critters like a rabbit darting across the screen. Now, you might be wondering, what causes those annoying false triggers? Things like rustling leaves from the wind or bright sunlight can confuse the sensors and lead to unnecessary shots.
But don’t worry, there are ways to minimize those false triggers. Many cameras come equipped with dual PIR sensors, which help distinguish between background heat and the actual movement you want to capture. And then there’s calibration—why is that important? Getting your camera calibrated just right can cut down on those random photos, while still ensuring you don’t miss out on the wildlife action you’re hoping to track.
Next, let’s take a look at how to set up your trail camera for optimal results! Additionally, choosing a camera with advanced motion sensors can greatly enhance detection accuracy and reduce false alarms.
Frequently Asked Questions
How Do Trail Cameras Detect Movement?
Trail cameras detect movement through advanced infrared technology, ensuring high-quality image quality and weather resistance. With adjustable user settings for battery life and night vision, we can optimize camera placement and enjoy cost-effective wildlife photography.
How Does PIR Motion Detection Work?
PIR motion detection works by utilizing infrared sensors to detect heat signatures from moving bodies. For effective outdoor surveillance, we should consider installation tips, battery efficiency, and environmental factors affecting the motion sensing range for wildlife monitoring.
What Is PIR Sensitivity on a Trail Camera?
PIR sensitivity on trail cameras lets us adjust detection capabilities based on environmental conditions. We can customize settings for better camera performance, balancing temperature influence, battery life implications, and wildlife interactions according to our preferences and needs.
Which Is Better, PIR or Motion Detection?
We believe PIR technology outshines standard motion detection, offering superior accuracy and longevity for wildlife surveillance. Its low power consumption and cost effectiveness align with user preference trends, making it ideal for various camera placement strategies.